
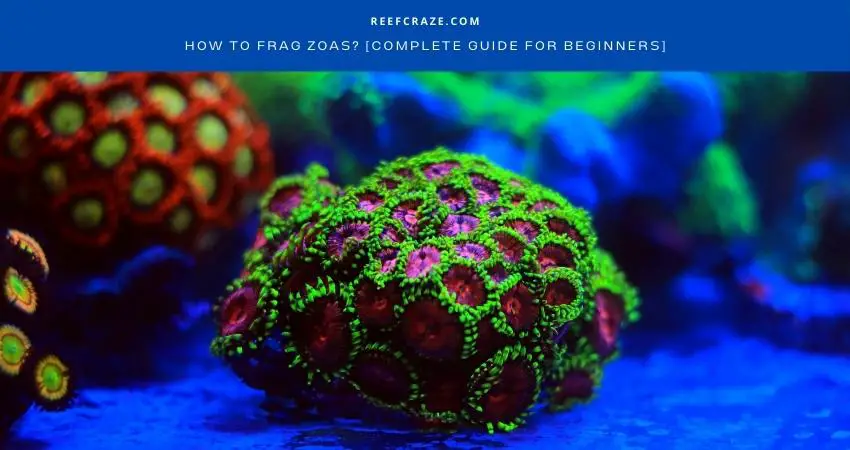
Like many other corals, zoas have been a thing of fascination for many reefers. They are a bright, colorful, and aesthetic addition to any reef tank. And if you are a professional aquarist, you wouldn’t mind making extra money by fragging and selling zoas. However, not all professionals know how to frag zoas correctly.
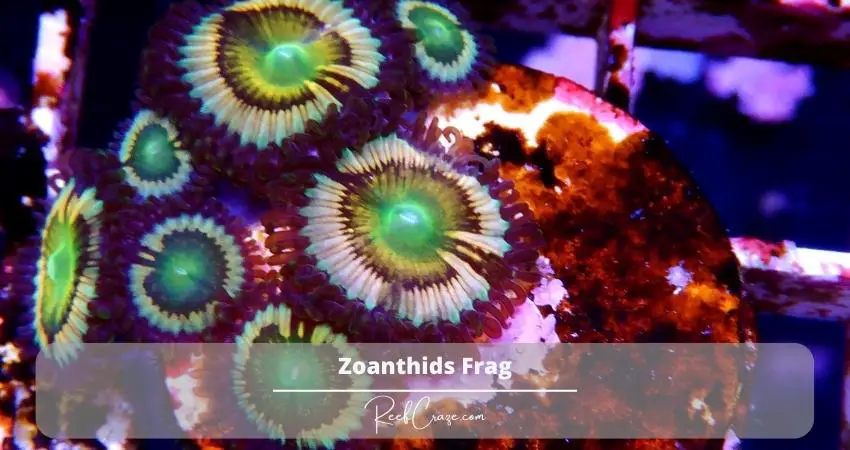
To frag zoas, first wear your safety & protective equipment and take zoas out of the aquarium. Then use a bone cutter or tweezer to slice the zoas and put them in a container filled with aquarium water. Finally, you can glue them to frag plugs or stones and place them in the low-flow area of the tank.
Like coral frag, zoanthids also require careful handling and maintenance. Why? I urge you to read the full article to learn about zoathidss fragging, necessary safety precautions, and more.
What Are Zoanthids/Zoas?
If you are used to seeing reef tanks or know what they look like, you will remember seeing some bright and colorful things inside the tank. They can either be all the same or various types, making the tank appear natural and magnificent. But what are they?
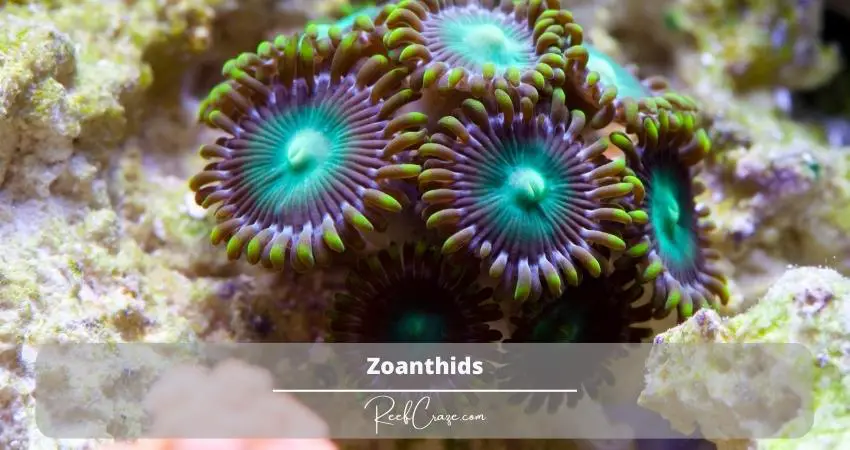
These shiny, colorful and bright things are called Zoanthids or Zoas for short. They are soft corals found mostly in tropical and sub-tropical marine environments. And what makes zoas distinguishable from other corals is their soft and marginal tentacles.
Zoanthids can grow extremely fast and expand their new colonies within weeks. While some zoas depend on their zooxanthellae as a food source, others can be fed with different particulate food.
Zoas are said to be the best type of corals for beginners as they do not require heavy maintenance. Moreover, zoas do not need much light like most other corals. And they are ideal for fragging as rare zoas can be sold at a high price on the marketplace.
Why Should You Frag Zoas?
Regardless of your purpose, fragging zoas from time to time is healthy for your tank environment. Besides, removing a portion of zoas colonies helps keep the tank cleaner and maintain it more effortlessly.
But you can ensure all that only if you know how to frag zoas in the right way. In this part, you will find all the information regarding the tools and other tasks, along with a step-by-step guide on fragging zoas.
Read More: What is a frag tank
Tools Required For Fragging Zoas
You will need the following tools for fragging zoas.
- A sharp blade/Tweezer/Scissors: You will need something sharp to remove the zoas from their original colonies. You can keep a pair of scissors and a tweezer for easier fragging.
- Coral plugs: Instead of rocks, you can glue the frags to coral plugs.
- Reef glue: Reef glues are essential for sticking the frags to the plugs.
- Clean container with tank water: After taking the zoas out, you will need a container full of tank water to keep the zoas and clean them.
- Dry towel/fabric: Before gluing the frags to the rocks, stones, or plugs, you will need to dry them so that the glue sticks properly. That is when you will need a dry towel or a fabric.
Preparation Phase: Securing The Frags
You will require securing the frag to plugs or stones around the end of the fragging process. But it is essential to know everything about securing the frags. So let’s start with what people use as a securing substance. Some aquarists choose to secure the frags to the plugs to rocks using monofilament fish lines. And others would simply use super glue or, better, reef glue for the job.
While both processes work well based on individual choice, they may not always work similarly. Glue is ideal for securing or attaching small frags to the frag plugs and rocks. However, if you plan to secure a larger colony, monofilament fish lines would be an ideal choice. Now, what is the best thing to attach the frags? Should you use frag plugs or aquarium stones, or will rocks be good enough?
The answer is both are correct because all aquarists use frag plugs and rocks to attach the frags to. If you want to use something natural rather than spending money on buying plugs, I would say live rocks will be your best choice. You can get a chunk of live rock out of your aquarium and attach multiple frags to it. On the other hand, frag plugs work great to relocate frags and grow them. And they are best to use if you plan to sell these fragged zoas or use them for commercial purposes.
Zoas Fragging: Step-By-Step Guide
Now, let’s see how you can frag zoas and mount them to rocks or frag plugs.
Step 1: Set Up The Workplace
Though fragging zoas is not much of a big or time-consuming work, it is still necessary to set up a workplace. Get your equipment and fragging kits, and make sure to lay a dry towel or fabric. Since you will be dealing with wet objects and tools, it is essential to ensure the place won’t be slippery.
Step 2: Wear Protective Equipment
On the surface, zoas are beautiful and look harmless. But they can be highly toxic and end up making you hospitalized. So make sure to wear latex gloves from touching anything toxic. You should also wear eyeglasses and a mask to prevent anything from getting in your eyes or inhaling them.
Step 3: Pull The Zoas And Rocks Out Of The Tank
Choose which zoas colony or part of the colony you want to frag, and then carefully pull it out of the tank. Then if you plan to secure the zoas to live rocks instead of frag plugs, select the rocks you want to use based on how many frags you will have. The good thing about using live rocks instead of plugs is that you can attach more than one frag.
Step 4: Frag Zoas
Now, take a pair of scissors to separate the zoas and remove the frags from the colony. You can also use a tweezer if necessary. Try to cut the zoas in a way it becomes easier to attach them to the plugs or rocks.
Step 5: Place The Frags In A Bowl Of Tank Water
Zoas release brown slime when you cut them. You would not want to handle them when these things are still on them, making it essential to clean the zoas. So take a small container and fill it with aquarium water. Then place the zoa frags in the container as you frag them.
Step 6: Select Frag Plugs Or Rocks
You can choose frag plugs or live rocks to attach your newly fragged zoas. You can also do both based on how you like them or whether you want to sell them. Frag plugs and live rocks are both excellent for growing new zoa colonies. However, frag plugs will be more convenient if you want to grow or sell them commercially.
Step 7: Secure The Frags
Once you are done fragging, and the fragged zoas are cleaned in the tank water, you can prepare them for securing them on frag plugs or rocks. Dry the rocks and the frag bases on the towel, and then squirt some glue on the rocks or plugs. Then place the zoa frags on them and wait for them to stick.
Step 8: Place Frags To The New Location And Let Them Settle
Place the secured frags in their new location but make sure the flow is comparatively low there. Give the frags a few days to settle in their new place, and they will begin opening soon.
Is It Really Necessary To Frag Zoanthids?
Is fragging zoas necessary? No. But learning how to frag zoas can help you if you ever need to frag them. While it is not an essential task, you can frag zoas from time to time for various reasons. Here is why you should frag zoanthids.
1. Control Overgrowth
Zoas are colorful and vibrant, making it seem unnecessary to eliminate any part of them. Besides, they are the most diverse type of corals and appear exceptionally beautiful even in a fish tank. But like other corals, zoas also grow and overpopulate the tank.
In fact, newly fragged zoas grow incredibly fast and can grow like their original colony just in a few weeks. And if you have a small or medium aquarium, you will not want them to expand more than necessary and suffocate other substrates and animals inside the tank.
Moreover, overgrowth of zoas can hamper the tank’s ecosystem and impact other tank inhabitants’ health. That is why it is essential to frag zoas to keep the population under control.
2. Earn Extra Cash
The second and most common reason aquarists frag zoas is to make money. Since zoas increase the beauty of the aquascape, many starters and hobbyists prefer having them in their tanks. Fragging zoas and selling them is an excellent way to make money rather than getting rid of them for nothing.
3. Prevent Extinction
This might sound silly, but nature is unpredictable. With all the rough things we are putting the world through, we lose many marine lives yearly. So fragging zoas and passing them on to other aquarists is like spreading them and saving extinction. The more frags you share, the more zoas you help grow elsewhere.
Are Zoanthids Toxic?
There is a strong debate regarding whether or not zoas are toxic. While some people would say zoas are completely harmless, others believe they are toxic and dangerous. As a result, handling zoas comes with some safety precautions.
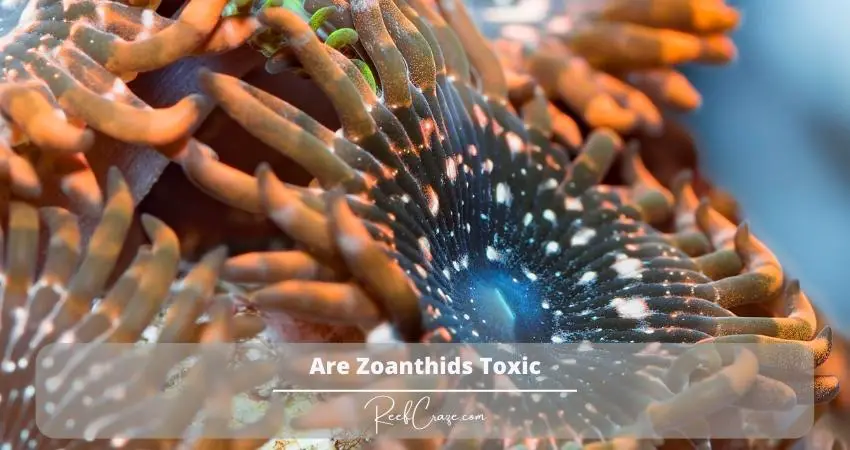
So instead of going through debates and what other people think, I did my own research and found some vital information. Zoas are toxic, all right. Maybe the people who think they are safe have not experienced any major issues, but one should be very careful when handling them.
Anything that belongs to the Zoanthids family contains a dangerous toxin called palytoxin. Often referred to as PTX or PLTX, palytoxin is known to be one of the most poisonous substances. So I believe I do not need to explain further whether zoas are toxic or not.
While some zoas can turn out safe to handle, most of them belong to the palytoxin type, making it essential to maintain safety precautions. Most importantly, make sure that consuming zoas or their slime or getting them on open wounds is very dangerous and life-threatening. I will discuss safety and other necessary tips in the following parts of this article.
Safety Precautions
So why do you think you need safety precautions when fragging zoanthids when they appear completely harmless? Well, don’t let their beauty fool you because zoas are toxic and cause some serious harm. As mentioned a while ago, zoas contain a deadly toxin called palytoxin. So when you frag zoas or corals, you expose yourself to these toxic chemicals. And if you do not take any safety precautions and come in contact with this toxin, it can give you a ride to the emergency room.
How do you know if you are under a chemical attack when handling zoas? These are the signs you need to watch out for.
- Metallic taste
- Burning or tingling sensation on skin or body areas
- Respiratory issues
- Hypertension
- And in the most critical level, coma
So, what do you do to ensure your safety? The solution is to wear protective equipment and ensure your best to avoid direct contact with zoas. Here are what you will need for safety during fragging zoas.
- Protective eyeglasses
- Latex gloves
- Coral disinfectant
- Masks (optional but necessary)
Necessary Tips
Since zoas are not exactly the safest corals, it is mandatory to follow some other necessary tips. You know now that you will require some fragging tools and equipment to do the job.
These tools also need proper handling and cleaning after you are done fragging. You would not want toxins and chemicals in zoas to stay on your tools because they can harm you and others if not cleaned properly.
Safety Is A Must
We have been through this already, but let me remind you again. It does not matter if everyone tells you the zoas you have are safe. Even if they are, it is still best to ensure you have taken precautions. So make sure to wear protective eyeglasses, masks, and latex gloves to prevent any unexpected occurrences.
Clean And Rinse The Tools Properly
You will use tools like bone saws, tweezers, scissors, etc., to separate the frag from its original colony. Since zoas and corals release a brown and toxic substance when they are being cut, they will stick to the pieces of equipment you use. Make sure to clean and rinse them well, and you can use RO water to prevent rusting.
Allow Them To Heal
As an aquarist, all marine lives should matter to you, including the zoas. The first step is placing them in water during the fragging process. And once you are done, you can place them in a tank area where the water flow is comparatively low. It helps the zoas heal and also improves their health.
Frequently Asked Questions
1. How long does it take for zoa frags to grow?
2. How do you attach zoas to rocks?
3. How long do zoas take to open?
4. Do I need to take off the frag plugs?
5. Can you secure zoas with superglue?
Final Words
Fragging zoas is not much of a big deal and does not require any previous experience. However, knowing how to frag zoas allows you to complete the task more cautiously, as sometimes, handling zoas without precaution is dangerous. Nevertheless, rehabilitating zoas is an excellent practice to ensure their tank population remains under control.